Productos
Thumb Joystick
Joystick resistivo de dos potenciómetros y botón de selección
COD: SFCOM09032
Peso: 0.007 Kg
Disponibilidad: Sin Stock
ARS 6055.00
El producto no está disponible para la venta en este momento
Características
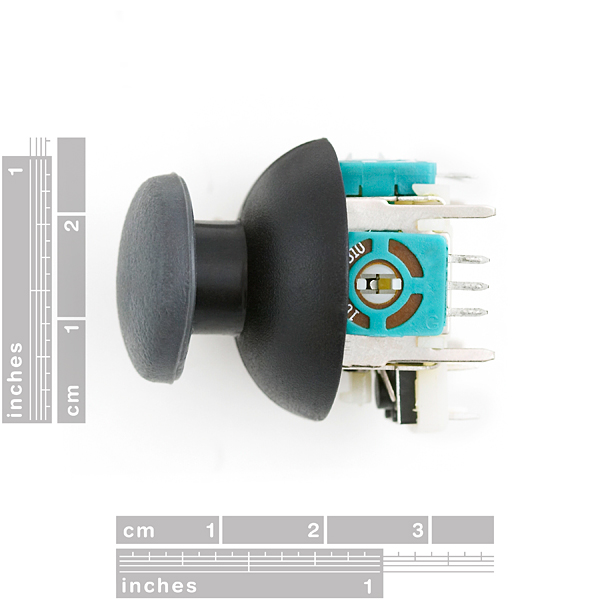
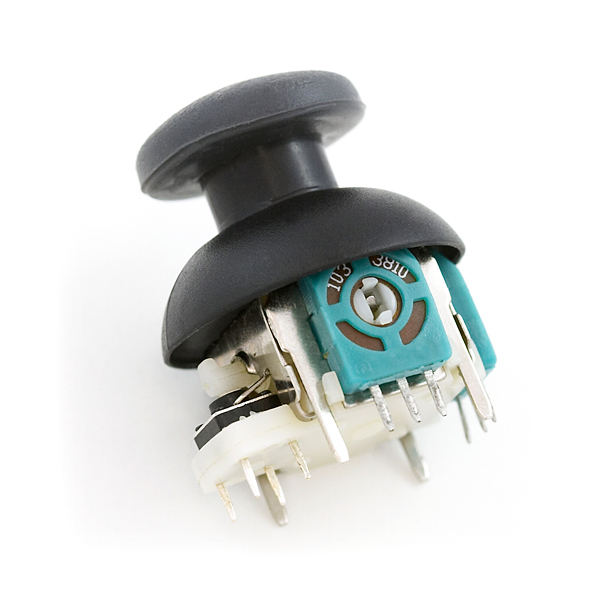
Description: This is a joystick very similar to the 'analog' joysticks on PS2 (PlayStation 2) controllers. Directional movements are simply two potentiometers - one for each axis. Pots are ~10k each. This joystick also has a select button that is actuated when the joystick is pressed down.
Use it!
The breakout board provides five labeled connections. You'll connect these lines to your project or microcontroller:
- VCC: connect this to your positive supply (usually 5V or 3.3V)
- VERT: this is the vertical output voltage (will be half of VCC when the joystick is centered)
- HORIZ: this is the horizontal output voltage (will be half of VCC when the joystick is centered)
- SEL: this is the output from the pushbutton, normally open, will connect to GND when the button is pushed (see example code below)
- GND: connect this to your ground line (GND)
Note that the pushbutton (SEL) is connected to GND when pressed, and open (disconnected) when unpressed. Use a pullup resistor on your digital input so that when it's unpressed, your input will read 1 (HIGH), and when pressed, the input will read 0 (LOW). Many microcontrollers have internal pullup resistors you can use for this purpose. See the example code below for how to do this on an Arduino.
Here's an example Arduino sketch which sets up the microcontroller to read the inputs, and then continuously prints the values to the serial monitor. If you're using a different microcontroller, the steps should be similar; you'll just need to determine how to read analog and digital inputs on your device.
// Thumb Joystick example
// Mike Grusin, SparkFun Electronics 3/11
// This code is free, baby. Use it however you like.

// This sketch shows the basic operation of the Thumb Joystick (COM-09032) and breakout board (BOB-09110).
// The joystick outputs two analog voltages (VERT and HORIZ), and one digital signal (SEL) for the pushbutton.

// Connections to joystick (change if you use different pins):

const int VERT = 0; // analog
const int HORIZ = 1; // analog
const int SEL = 2; // digital

// Also connect the joystick VCC to Arduino 5V, and joystick GND to Arduino GND.

// This sketch outputs serial data at 9600 baud (open Serial Monitor to view).

void setup()
{
  // make the SEL line an input
  pinMode(SEL,INPUT);
  // turn on the pull-up resistor for the SEL line (see http://arduino.cc/en/Tutorial/DigitalPins)
  digitalWrite(SEL,HIGH);

  // set up serial port for output
  Serial.begin(9600);
}

void loop()
{
  int vertical, horizontal, select;

  // read all values from the joystick

  vertical = analogRead(VERT); // will be 0-1023
  horizontal = analogRead(HORIZ); // will be 0-1023
  select = digitalRead(SEL); // will be HIGH (1) if not pressed, and LOW (0) if pressed

  // print out the values

  Serial.print("vertical: ");
  Serial.print(vertical,DEC);
  Serial.print(" horizontal: ");
  Serial.print(horizontal,DEC);
  Serial.print(" select: ");
  if(select == HIGH)
    Serial.println("not pressed");
  else
    Serial.println("PRESSED!");
}